Ultimate Kadence Custom Fonts Guide (2025)

This is a complete guide to import fonts on your website.
If you want to import a font into your website or preload Google Fonts to improve the speed of your website, you’ll enjoy following this tutorial.
Let’s start!
How to download Kadence Custom Fonts
We’ll use Kadence Pro Version in this tutorial, but this is going to be relatively similar if you use another theme builder.
First, we need to activate the plugin.
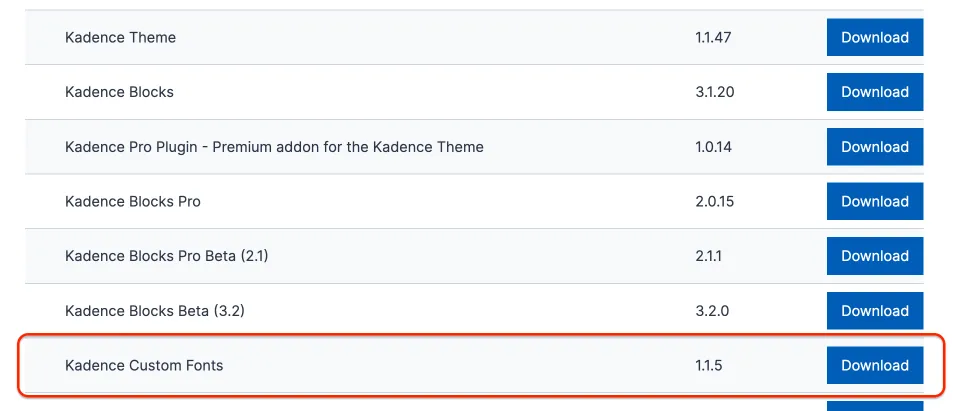
On your Kadence account, simply click on Product Downloads and download Kadence Custom Fonts.


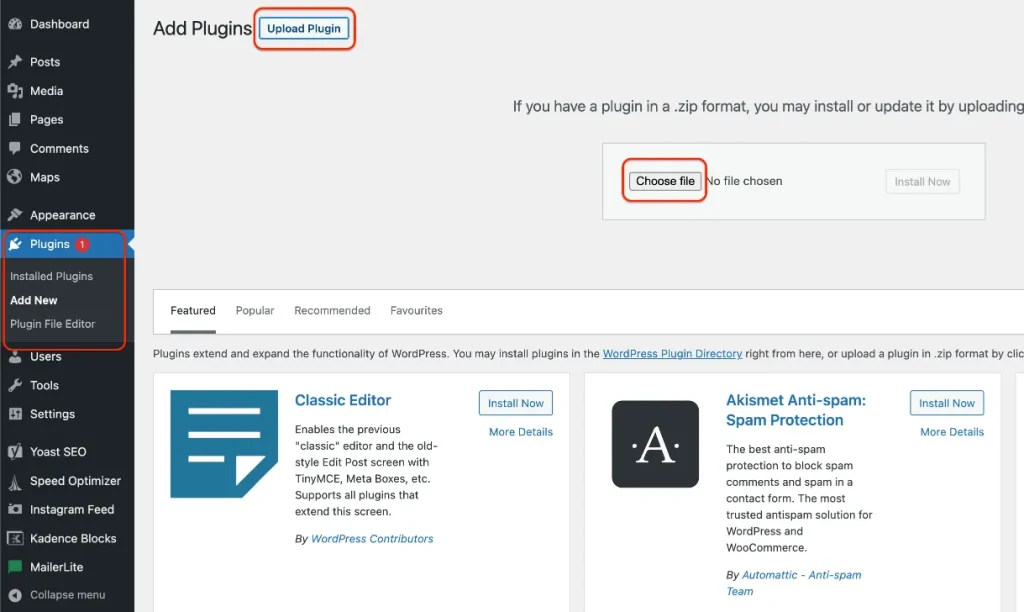
Next, on our WordPress dashboard we go to Plugin > Add New and we import our file after clicking in Upload Plugin. We need to Install and Activate.
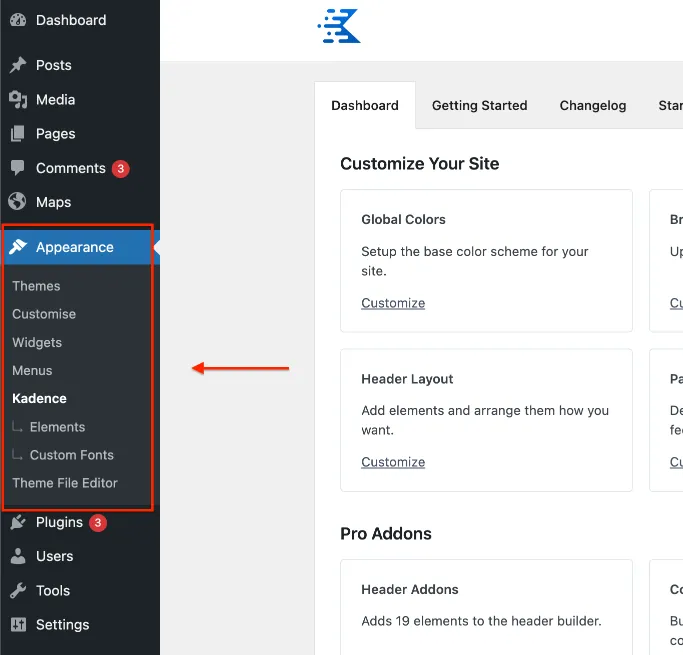
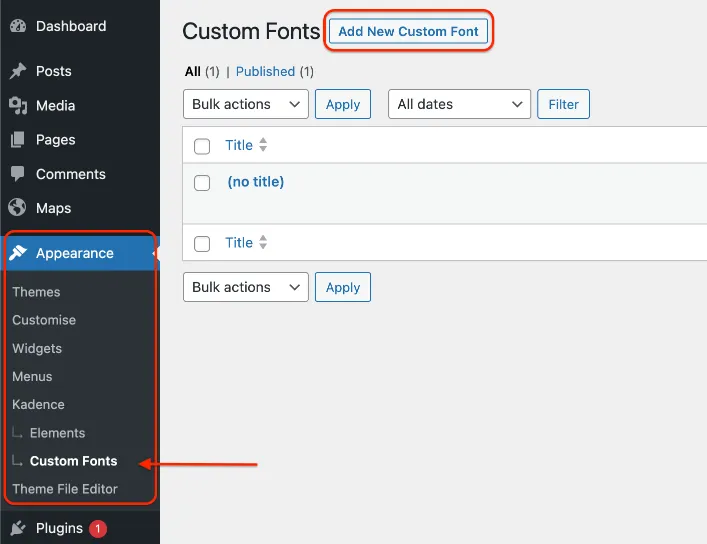
If it has been done correctly, your new feature should appear under Appearance > Custom Fonts.
Where to download fonts
By using Google Fonts you can download any fonts used by Google.

If you want to download a font not used by Google, there are many websites that allow you to download fonts, such as dafont or 1001freefonts.
Just be careful to check the copyright.
Here is the file from Google Fonts – we can see all the different families of the Fonts.
How to optimise your font
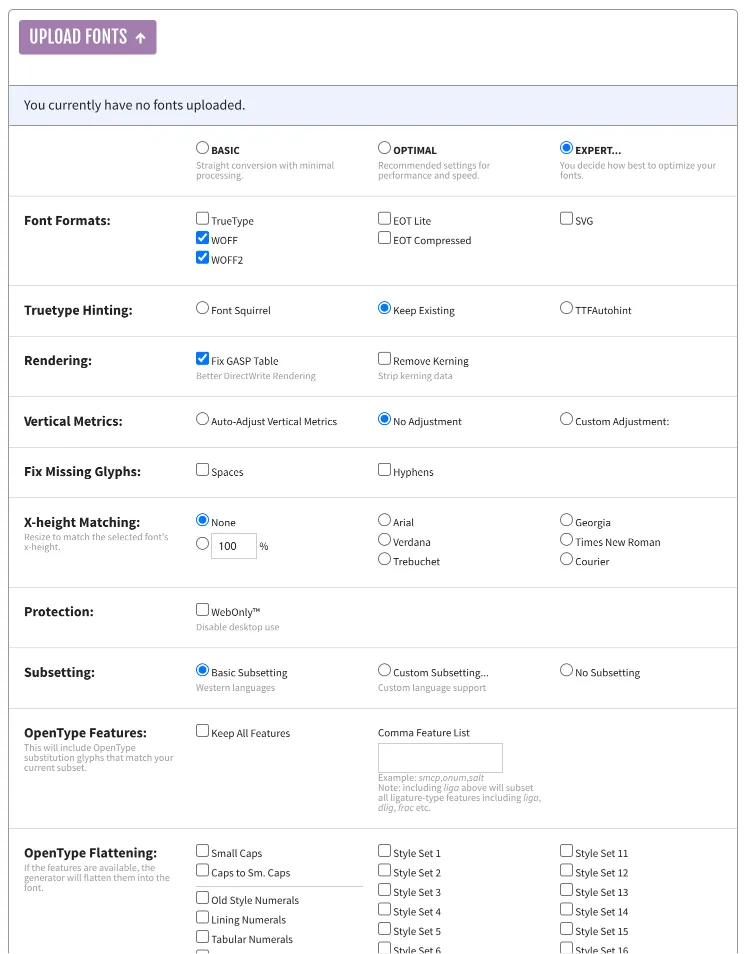
To convert our fonts to the best format for websites, we’ll use Fonts Squirrel. At the same time, we’re going to make it lighter by following these steps below.
Uploads Fonts > Expert… > WOFF / WOFF2 > Keep Existing > Fix GASP Table > No Adjustment, and we’ll need to tick the Agreement.
You can find in-depth tutorials with video for this step at Jeffrey @ Lytbox.
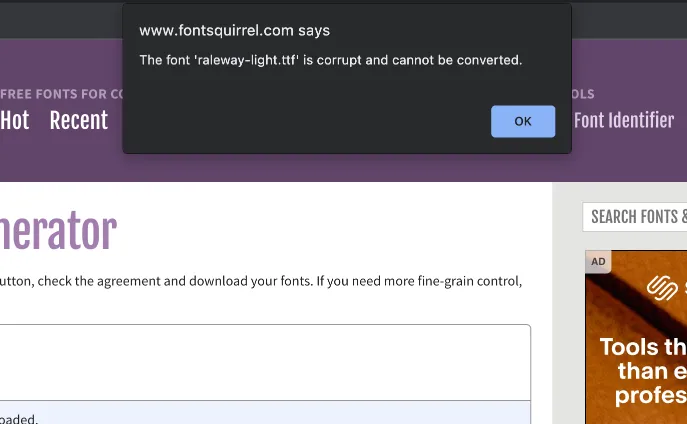
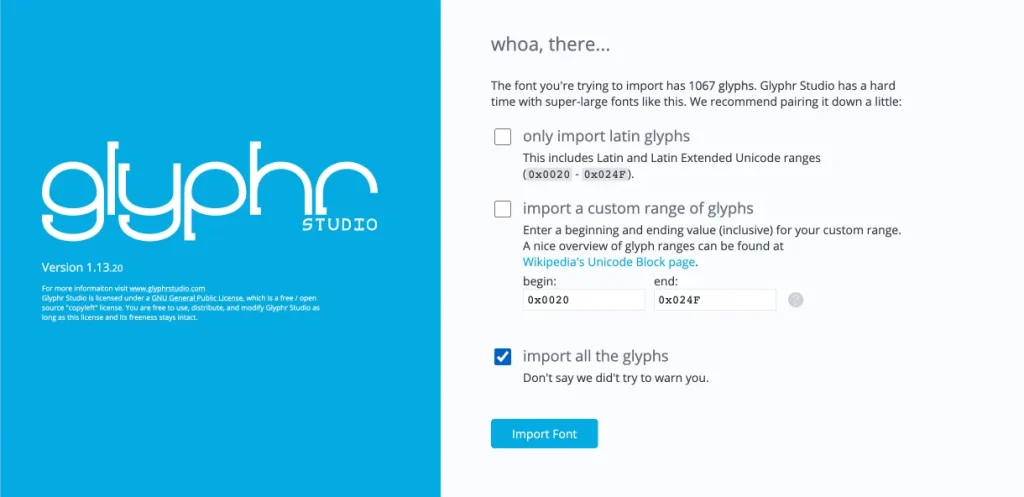
If your font receives a pop-up as below, ‘The font ‘raleway-light. ttf’ is corrupt and cannot be converted’, we’ll need to use another website before using Fonts Squirrel.
So, we go to GLYPHR Studio, click on load and drop the file (ex: Raleway-Bold.ttf). After loading is complete, we download the file as OTF.
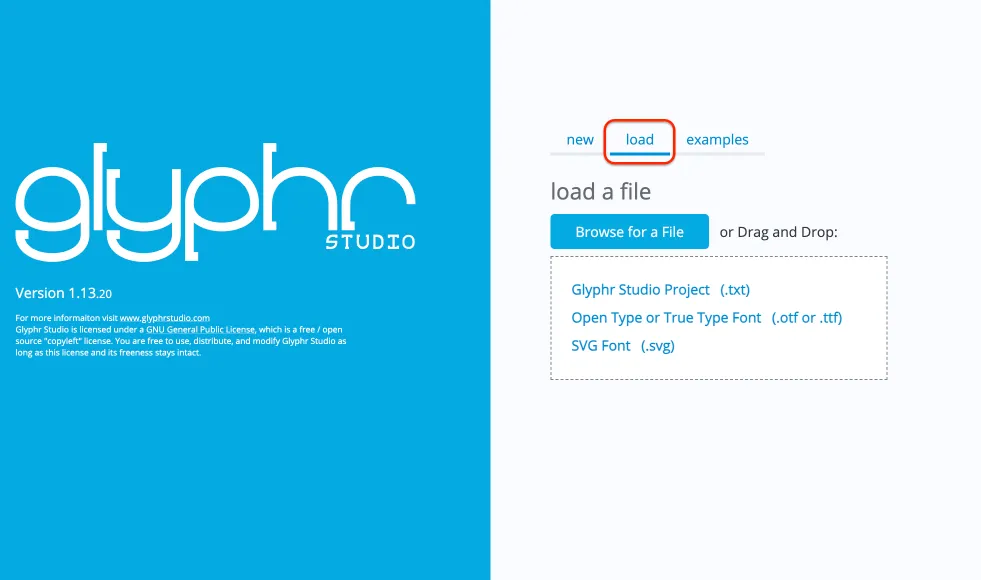
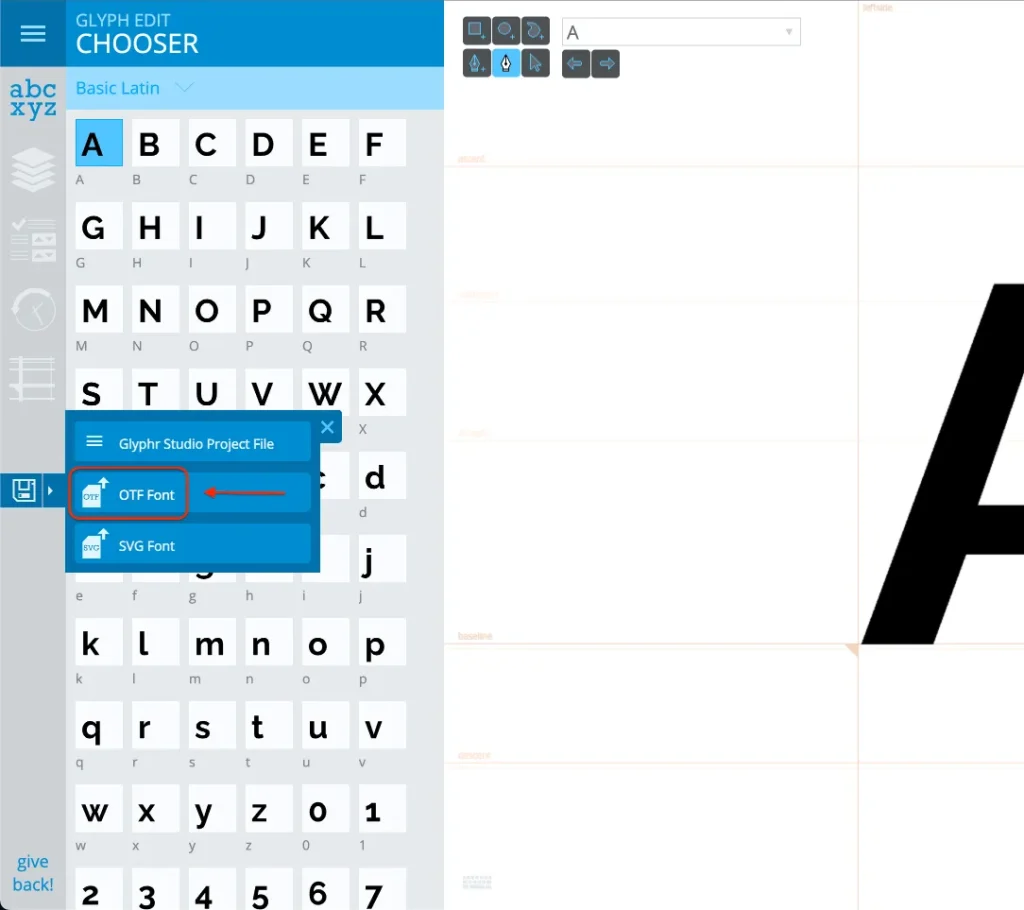
Repeat the cycle (Glyphr – Fonts Squirrel) for each font that you need.
We’re going to repeat this step for each Style or Weight of your font.
How to import the custom fonts
Back to our Kadence Custom Fonts. Now, simply click on Add New Custom Font.
A page will open and we’ll be able to give a name to our Font and import the files .woff and .woff2 which we downloaded after the Font Squirrel step.
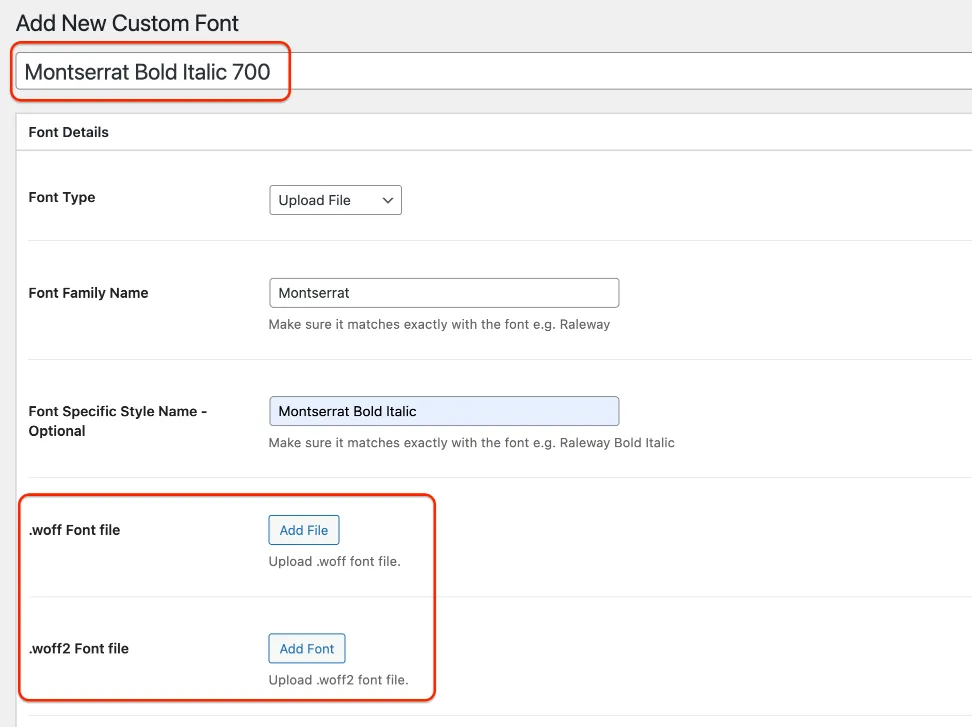
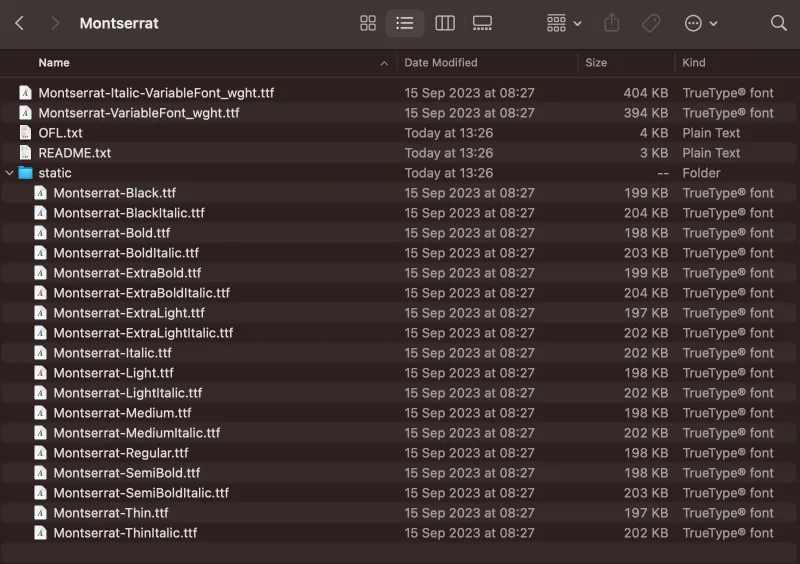
When the file is imported, we must ensure we assign the right name to it.
Just as the small comment under the text box proclaims, we’ll need to follow the process and give the main name (such as: Montserrat) and the specific Style Name (such as: Montserrat Bold Italic) exactly matching the font.
You can find the name of the font in the file, visible after downloading the Google Fonts. For example: Montserrat-BoldItalic.ttf equates to Montserrat Bold Italic.

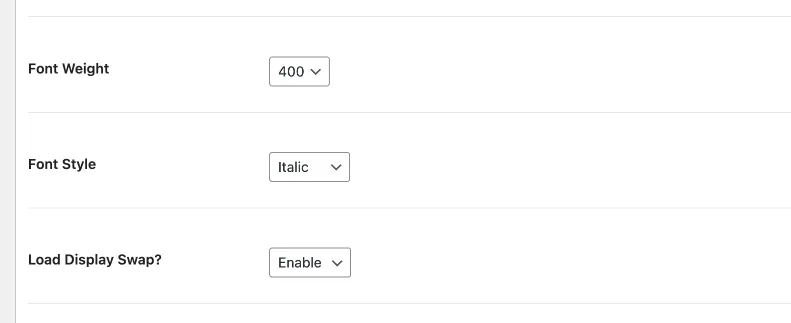
For the final step of this long process, we’ll need to inform the plugin of the size that we want to attribute to the Font, and if it’s an Italic font style.
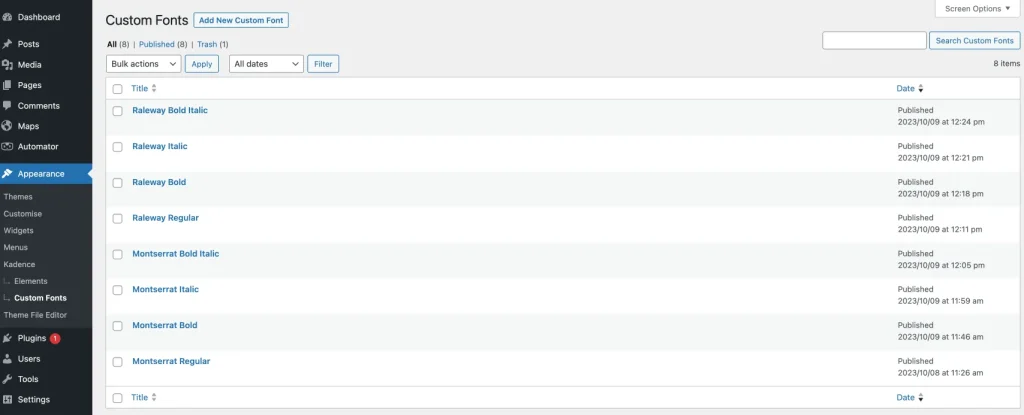
After repeating the process a couple of times, we now start to have a list of fonts. You can include the size of the font in your naming conventions as well.
Great!
We are finally done! Though following these steps for each font and size is a bit of a process, it’s worth it to ensure the speed of your website.
If you are interested in other tutorials on using the Kadence theme, you can visit our post on Kadence Mega Menu or Kadence Sidebar.